Friday, January 29, 2010

Nars Orgasm Blush, $25


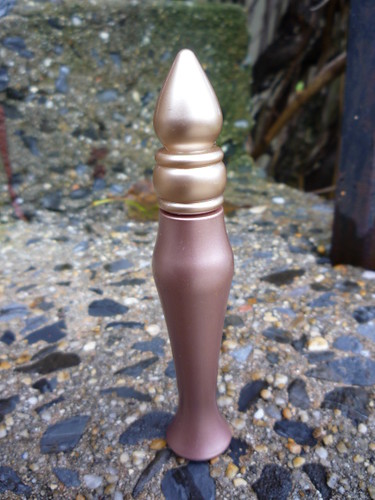
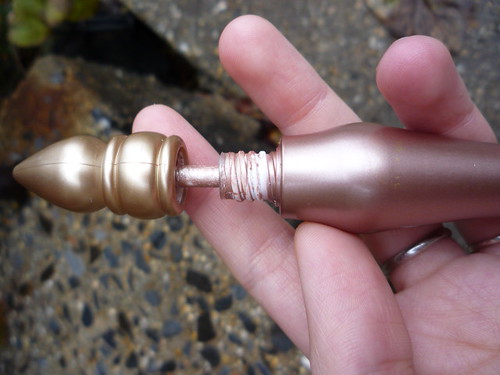
I knew about Nars’s Orgasm blush long before I ever used it. Orgasm is like the iphone of the makeup world, the hype surrounding it is deserved. The name Orgasm is pretty memorable, because lets face it, sex sellz. So over the summer I decided to try out the Nars Orgasm blush and Laguna bronzer duo, the gift set even came with an Orgasm shade nail polish. From the first time I used it I knew that this blush would replace any other blushes I have ever used. Not only does it color your cheeks but it makes your skin actually glow. I have always wanted to achieve that perfect polished glow on my cheekbones but I never thought that a blush would help me achieve it. But I guess with a name like Orgasm the glow better be included.


I put this on last when I’m getting ready in the morning, but it can also be the only thing you put on. Sometimes I’ll come home from work looking mad tired, and I’ll just brush some on and look awake again, it truly is the finishing touch. A few light sweeps of this and your skin already looks better. I admit, I go a little heavy on the blush in the morning because I figure I’ll touch my face a million times before I even step out the door but I never feel like I’ve caked it on. Its texture is light enough that you can wear it in the summer and not feel like you have anything on your skin. The color is marketed as being sheer but I would say it’s more complex than sheer. Sheer sounds like pantyhose--Orgasm is thigh highs. It’s a layered mix of pinks, golds, and corals, with a sheen and a sparkle, and no overpowering colors.

How to:
1. Using a basic blush brush, put a little or a lot of blush on the brush.
2. Tap excess blush off of brush.
3. Smile and brush on apples of cheeks. If you want an extra glow move from the apples up your cheekbones (this is what I usually do).

Final Verdict:
Cost: $25
How long the makeup stays on: The product is pretty good at staying on most of the day, it definitely fades in color throughout the day but there seems to always be a hint of the glow on your skin. I usually reapply a few strokes in the afternoon if I really want some color in my skin.
How long the actual product lasts: I’ve had mine since June and use it daily and it is nowhere near close to being done. This stuff is pretty potent.
Repeat Offender?: Yes, definitely, more, please.

-M

Wednesday, January 27, 2010

Lubriderm Intense Skin Repair Body Lotion, $7-$8

(Lubriderm Intense Skin Repair Body Lotion)

If you're looking for a nice, thick lotion to use on your super-dry, winter-irritated skin, Lubriderm's Intense Skin Repair Body Lotion will save the day. I use this all winter long, applying it immediately after my shower. And when it says it lasts 24 hours, it's not kidding; I've gone in the shower the next day and still felt it on my skin! I feel like it has actually healed some recurring problems I've had with my skin. It's the only thing that has helped reduce the bumps I get on my hips and thighs, and I've used it on my feet to treat calluses. It has a very light, pleasant fragrance that's not going to interfere with any perfumes. Plus, it's only $7-$8 for that gigantic bottle (with a pump that closes), which is definitely worth it for me.

The only downside? I can't use it as much in the humid-as-hell mid-Atlantic summers--one time I tried and could feel myself sweating under the protective shell it creates. So, in the summer I'll only use it on my problem areas. It's really best for winter, or if you live in a drier climate.

Final verdict
Cost: A huge bottle is less than $10--can't beat that!
Availability: Unlike other high-end lotions, you can buy this one at CVS, Target, Walmart, etc.
Year-round?: Unfortunately this one is too heavy to use during humid summer months, but is a life-saver in the winter.
Long-lasting: It stays true to it's "24-hour moisturization" claim and lasts all day.
Repeat offender?: Definitely--I'm on my third bottle so far! Keep in mind, though, it's really only best for seriously dry skin.

-T

Monday, January 25, 2010

Mini Nail Lacquers from OPI inspired by Alice in Wonderland, $10


When I think of Alice in Wonderland I'm immediately transported back to my childhood: the innocence of Alice, the mystery of the hookah smoking caterpillar, and of course the eerie amusement of the Mad Hatter. I was more than thrilled to hear about Tim Burton directing an Alice remake, and then equally (if not more) ecstatic that OPI was releasing a special collection of Alice in Wonderland polishes inspired by Burton’s Disney remake. These polishes immediately made my inner "I need to own this thing NOW" list and last weekend I stumbled upon the mini collection pictured here at Trade Secret.

(front of the box)

The collection includes 4 colors--2 glitters (you know my feelings on sparkle polish!) and then 2 solid colors. Since the entire collection consists of just 4 colors, the mini set is appealing because it allows you to own a small bottle of each color. The 4 mini polishes come in a little box that is decorated with a whimsical mushroom and forest scene. The back of the box has equally whimsical descriptions of the colors.

(Absolutely Alice, Thanks So Muchness!, Off with Her Red!, Mad as a Hatter)

“Absolutely Alice” is obviously inspired by Alice’s signature blue dress. However, the polish does not compare to a plain blue dress. “Absolutely Alice” is made of small blue and silver sparkles that is more reminiscent of Cinderella’s ball gown than Alice’s blue frock. This polish looks great with 2 to 3 coats.

“Thanks So Muchness!” is one of two red shades that are included in this collection. This red makes me think of a very luxurious candy apple that has been dipped in a shiny red candy over and over again. “Thanks so Muchness!” is more than just red, it is a ruby red with some very tiny red sparkles mixed in. This would look really wonderful paired with a little black dress.

My favorite of the collection is “Off with Her Red!” This is the second red shade in the collection. “Off with Her Red!” has the coolest name for a red polish ever! This is a very genuine solid colored polish that does not have any added sparkles. The polish’s hint of orange reminds me of the color of blood oranges. I am considering buying the full size of “Off with Her Red!” since it is the perfect bright shade of red.

The fourth polish in the bunch is “Mad as a Hatter.” This polish is the second glitter polish in the collection. “Mad as a Hatter” is a bottle of confetti made with tiny multicolored sparkles, the majority being silver, purple, and blue. This also requires 2 to 3 coats and probably a top coat. A friend of mine who also owns this polish let me know that the sparkles tend to flake of fairly easily. I would suggest an extra top coat to try to make sure the sparkles stay put.

(We're all mad here. . .)

Final Verdict:
Cost: $10.00 for the set of 4 mini polishes.
Collection as a whole: A nice fun range of polishes for the end of winter months.
Repeat offender?: I’d probably just buy Off with Her Red! in a full-sized bottle, but probably not the whole set of mini polishes (unless they are on sale in a few months!)

-M

Friday, January 22, 2010

Perfekt Beauty Eye Perfection Gel, $45

(Perfekt Beauty Eye Perfection Gel in Bright)

I received a sample of Perfekt Beauty Eye Perfection Gel in Bright with one of my many Sephora.com purchases. The point of the “gel,” it says, is to even out the skin color under the eye and to “brighten” the eyes, to make you look more awake. The first thing I realized is that “gel” is a complete misnomer; it’s really more like whipped foundation.


As you can see, the texture is airy. This actually made it harder for me to get an even coat—it seemed to snag on all the imperfections it was supposed to cover! Once I got it blended the best I could, I felt a not-entirely-unpleasant cooling sensation (perhaps a little too cold for winter, though). Once set, my skin did feel velvety smooth, even though I could still pretty easily see my under-eye darkness. I tried to layer more on but soon gave up. It started to look really obvious I was wearing a lot of makeup under my eye, a look I’m not really into. I felt a little disappointment, which soon turned to shock when I looked up the price. No thanks!

Final verdict:
Cost: Are you kidding me?? $45 for 0.3 oz?? I’m almost personally insulted.
Blendability: The “gel” actually has more of a whipped texture, which made it hard for me to blend.
Bright eyes?: Not particularly. The cooling sensation was just okay—I didn’t really see my eyes perk up like I expected. The coverage was okay. The finish was nice and smooth, but just not enough to make up for its other flaws.
Repeat offender: Hell no. I mean, as a product it’s alright, if it was, like, $7. Even then I probably wouldn’t buy it again, but at least I wouldn’t feel like an idiot for spending $45 on something that’s just . . . okay.

-T

Wednesday, January 20, 2010

Sephora by OPI Sparkle Nailpolish, $9

(Untarnished Image, Worth My Weight, Too Good for Him)

If you’re like me, and your idea of heaven is attending a roller disco with Cher, hot dudes, wearing gold roller skates, and an amazing outfit of tube socks, hot pants, and a gold top to match your skates, then you really need to get your butt to Sephora and pick up their sparkly nailpolishes! Ok you don’t need to be delusional and certifiable like me to enjoy sparkles but these nailpolishes are just so fabulous a roller disco heaven is the only way I can do them justice.

(Worth My Weight)

I first got the gold polish which is called “Worth My Weight.” This polish is so pretty because it has these big gold sparkles mixed with different colored glitter pieces, which gives a hologram effect. Unlike other sparkle polishes I have used, this does not have any base color; it is pure glittery flakes. Two coats and your nails actually are a gold color, not just a lame sheen of gold.

(Too Good for Him)

The next one to try is the special New Year's color appropriately named “Too Good for Him.” Not only is it purple sparkles, but its name is just, well, too good. I sported this polish on New Year’s Eve and I was told by at least 3 people how I was the most sparkly person at the party—my sequined top may have helped too. The purple sparkles are laced with blue and silver ones as well, offering a nice range for the main color to stand out.

(Untarnished Image)

The third polish is a silver bottle of perfection called “Untarnished Image.” This silver is probably my favorite of the 3. One coat gives you a pretty sprinkle of silver sparkles (say that five times fast), 2 coats gives you a rich full silver nail, 3 coats makes you feel like a princess. Seriously the silver just goes on so easily and shines so much you can’t help but look down at your hands. This color is great for toes too—I imagine it would look great with a pair of black open-toed pumps.

It is really important to use a base coat and a top coat when wearing these polishes. My only complaint is that they are really hard to take off with nailpolish remover. In a way it is nice because the manicure lasts for longer than a week but when you are ready to take it off it might take a little muscle. The base coat is going to protect your nail from the strong polish (I’m guessing it dries on harder than a regular polish so that the sparkles stay put). The top coat offers a smooth finish—if you don’t use a top coat the texture of the nail dries kind of grittier.

Final Verdict:
Cost:$9
Classy look or tacky look?:You aren’t going to look like some crazy club kid when you wear the sparkle polish. The polish is an unexpected touch that does not overwhelm your look.
Repeat offender?:These big bottles of polish are hard to go through and the colors are limited edition. I would definitely buy them again but I probably wouldn’t need to because one bottle lasts a long time. I would however really love to collect any new sparkle polishes that may come out, a hot pink is what I have my heart set on!

-M

Monday, January 18, 2010

Urban Decay’s Urban Ammo Eye Palette, $36

(Urban Decay’s Urban Ammo Eye Palette)

This palette includes 10 classic eyeshadow shades by Urban Decay which are all very versatile and easy to blend. The colors are all very rich and can be worn separately, lightly, heavily, blended, or even just dusted on the eyelids. The colors look best when worn with the Urban Decay Eyeshadow Primer because it seems that the primer just makes the colors a few layers deeper and it just pops on your eyes. The palette is packaged in a compact and light case with very cool velvety details on the cover and a good-sized mirror inside. The palette definitely screams rocker from the outside, with an image of a purple gun blazing out skulls, butterflies, flowers, and hearts (Urban Decay really knows how to decorate a palette). Inside the palette is a double-sided eyeshadow applying brush that is very useful. Sometimes palettes come with brushes that don’t seem to help with eyeshadow application, but this small tool is definitely going to come in handy. This is a good set to take with you wherever you go because it is small and lightweight but still has 10 options to choose from.


One of my favorite shades in this palette is the shade Last Call. This shadow is not purple and it is not pink, but it’s somewhere in between the two. I usually just wear it piled on heavily on my lids with some black eyeliner and black mascara. It makes your eyes stand out without giving you that sick look you can often have when wearing a pink or reddish shade of eyeshadow. Another winner in this palette is the black glittery shadow called Oil Slick. I love using Oil Slick with almost all of the other colors in this palette. If you use one of the other shades and then blend a small bit of Oil Slick you have an instant colorful but still smokey eye. When going out at night, I do like to wear Oil Slick by itself (with the primer of course) for a look that Tori and I like to call “Rock of Love.” You know what I’m talking about, those chicks on Rock of Love may be trashy but sometimes their makeup just looks really badass! With the primer the black does not crease at all and goes on evenly. Overall this is a really great palette with shades that can work for pretty much anyone and it can also be a great gift to give.

(Oil Slick on my finger)

Final verdict:
Cost: I’ve seen it priced differently but it is always between $36 and $40. For ten shades of shadow in a compact case, with a mirror and a brush, it seems fair.
How long does the product last?: I have had my palette for well over a year, some of the shadows I use more than others but it is nowhere near being close to finished. The shadows look small but their intensity makes a little shadow go a long way.
Repeat Offender?: I’d say yes but the stuff never runs out! In terms of Urban Decay brand eyeshadows—definitely.

-M

Sunday, January 17, 2010

Haiti Relief


Our amazingly talented photographer friend Rafael Soldi has organized a benefit print sale to support the victims of the terrible earthquake that happened in Haiti this week. Each artist is donating one print, 8x10 inches at an edition of 10. Each print will be for sale at $50 and 100% of the proceeds will go to the Yele Haiti Foundation. Please take a look at the sale that starts Monday and donate for a good cause.

Please visit http://haitiprintsale.bigcartel.com/ on Monday January 18th to help Haiti.

Friday, January 15, 2010

Clinique Brush-On Cream Liner, $14.50


P1020343
(Clinique's Brush-On Cream Liner in True Black)

I’m a big fan of dramatic eyeliner, so I’m always eager to try new and exciting ways to play up my eyes. Pencils, liquid, gel--I want to know which ones are the best. I’ve always had trouble with my oily eyelids. Eyeliners always seem to want to smear under my eye or create little half-moon shadows on my eyelids. So, I was wary of cream liner. I mean, cream? Like lotion? How would this not make a huge mess on my face? After reading some favorable reviews on Sephora.com, I held my breath and bought Clinique’s Brush-On Cream Liner in True Black, and immediately fell in love.

The liner comes in a clean little glass pot with a shiny silver lid. The cream itself is highly pigmented and nearly solid, almost like a very thick cream eyeshadow. The one downside: It comes with a super tiny, almost completely useless brush that is an incredible pain to use (and I have pretty small hands). You absolutely need to buy an angled brush for this.

P1020365
(angled brush from Sephora)

I’ve found this liner to be so versatile; it can be used to make a skinny line, a fat line, a smooth line, or a smudged line. It’s also so easy to get the color right between the lashes. (Ever seen someone with a huge gap between the liner and their lashes? It’s pretty awkward.) And once on, it doesn’t move for hours and hours, even in humid and sweaty situations.

I’d recommend this product for the serious eye makeup junkie only. It takes a little more control, practice, and time than a simple pencil or liquid eyeliner. But, I must say to those who fear the brush: Don’t worry! It does get easier, and the end result is totally worth it.

Tip: For added staying power, use over our best friend, Urban Decay’s Eyeshadow Primer Potion.

To use:
1. Lightly press the tip of your angled brush into the cream. Brush it gently to the left and right, like a painter getting paint onto a brush. Wipe the sides of the brush on the rim of the pot to remove any excess or clumps, but keep a good amount on the edge.
2.With a light hand, draw a smooth line as close to the eyelashes as possible. Imagine you’re an artist painting a line on a canvas: pressing the brush too hard with push the color out to the edges and make the color uneven. It’s easiest if the long side of the brush is positioned toward the inside corner of your eye. I generally start in the middle and go outward, coming back later to connect a line from the inner corner to the middle.
*To fill in any gaps in your eyelashes, re-dip the brush and push and smudge it right onto the eyelash line.
*If your line appears uneven or if you’d like to smudge the liner for a smoky look, run your finger along the edge of the line with your finger before it dries.
*For a thicker or darker line, go over your line before it sets. Once it’s dried, it’s hard to blend or paint over.
*For the lower lid, I generally use a pencil for the inner rim, blending it into my eyelashes and the line I made under the lashes with the brush. You can use the cream liner for the inner rim if you’re careful, but it can be hard to do without getting makeup in your eye.
3.After use, clean the brush (I use a makeup remover pad) and let it dry before your next use. It tends to get crusty if left on the brush to dry.

P10203692

Final verdict:
Worth the price?: If you’re serious about your eyeliner, then yes. It’s a great product that lasts a long time. But, you also need to buy an angled brush because the brush it comes with is completely useless.
Level of expertise?: Advanced to expert. Not for the casual user. But, practice makes it much easier!
Versatility: Awesome--can be used to make all kinds of looks.
Repeat offender?: Absolutely. <3 It’s pretty much become my staple eyeliner.

-T

Wednesday, January 13, 2010

OPI Spain Collection Senoritas Mini Nail Lacquer Set, $10

P1020113
Suzi Skis (deep blue grey)
No Spain No Gain (berry)
Pink Flamenco (creamy hot pink)
RapiDry Top Coat (MUST HAVE!)

Hi, my name is Mirna, and I am an OPI addict. I don’t know if it’s the rich colors, the catchy names, or the always changing collections, but there is just a little something special about OPI that I cannot resist. The polish is always vibrant and luxe, and seems to be the best bet when it comes to durability. If I don’t paint my nails, I don’t feel “put together” (it's this and having a clean room, if I have bad nails and a messy room—my life feels like it's in shambles, weird—I know). I paint my nails once a week, and I primarily use OPI polishes, I have a few Essie polishes but haven’t gotten around to trying them yet (expect a review soon). When Sephora started carrying their own combination line with OPI I was more than thrilled, OPI polish was the only thing really missing from Sephora!

P1020123
Pink Flamenco

I got this collection of mini polishes from Trade Secret. The color on my nails now is Pink Flamenco. It is very, very pink without actually being a hot pink. I usually have dark polishes on, but every once in a while I like to add a little color to my nails, especially because they can look so good colorful while you are wearing an all black outfit. The mini polishes are a great deal because you get 3 colors and a RapiDry TopCoat for the price of one full sized bottle of polish. I usually go for full sized bottles but the colors in the collection were all intriguing to me so I thought I would give it a shot. Not to mention, the RapiDry TopCoat is amazing and I always use it along with the Sephora by OPI Nail Colour Drying Drops.

Final Verdict:
Is the mini set worth it?: Yes, if you like variety it's nice to spend almost the same amount for one large bottle of polish and get 3 colors and a top coat.
Repeat offender?: OPI is always a repeat offender.

-M

Monday, January 11, 2010

Urban Decay Eyeshadow Primer Potion, $17

Available in Original (nude) and Sin (shimmery)

P1020083
(Urban Decay potion in Sin)

If there is one makeup product that we could never give up it would be this. The years before we discovered this primer were full of creased eyelids, smeared shadow, and colors not living up to their potential. Not only does it work with great eyeshadows, it will actually improve the color and staying power of lower quality eyeshadows. The Urban Decay Eyeshadow Primer comes in two different shades, Original and Sin. The Original is pretty much a sheer nude base without any particular color so once blended in it’s invisible. The Sin shade is a shimmery mix of pink and gold tones while still remaining a pretty neutral base color that will coordinate with any eyeshadow just as well as the Original. It’s packaged to resemble a genie bottle, with a sponge-tipped angled wand as an applicator. It’s easy to use, lasts a long time, and is definitely worth its price. No lie, this stuff will last through a humid day, an evening of partying, and even a full night’s sleep without budging.

P1020084

To use, first unscrew the applicator, take it out, and wipe the excess on the rim. Apply a good amount over your entire eyelid (and even under your eyelid, if desired). Using your finger, blend the primer until even. Wait a few seconds for it to dry, and then pile on the eyeshadow and eyeliner like crazy. Wait a few hours, check the mirror, and check the freshness.

Final verdict:
Cost:
$17 (for regular bottle)
Does it keep its promise?: YES.
How long the actual product lasts: If used on a daily basis one of the original sized bottles lasts at least 6 months.
Repeat Offender?: We will never wear eyeshadow without it. Tell all your friends.

Ulta and Sephora have some great deals on the larger sizes.

-M & T